
We have prepared an instruction for you that will help you go through all the stages of registration on the Yesel website and start managing your stocks at DiFFreight warehouses in the USA. But before that, let's talk about the advantages of this platform:
Let's go to the instructions.
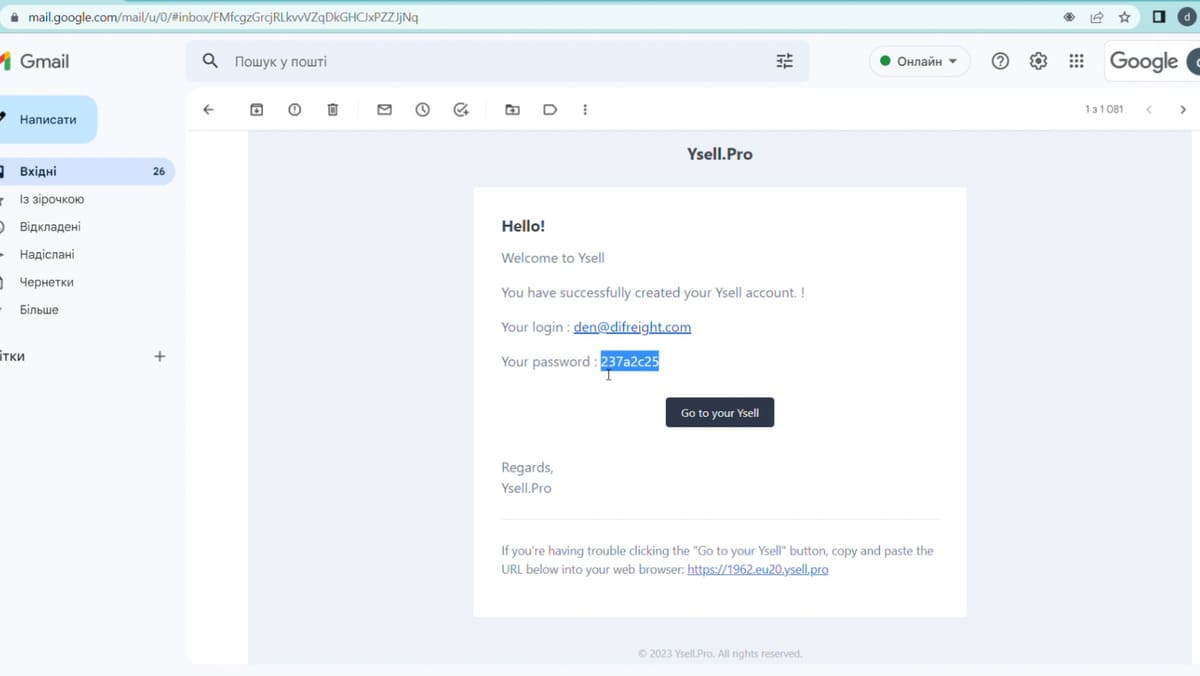
The first thing is to provide the mail to our manager so that he can send you an invitation to the email address. Confirm it.
The second - within 5 minutes after receiving the invitation, you will receive a temporary password and your email. Click the "GO to Yesel" link and enter your login details.
Third, choose the time zone and the desired language. As well as the values in which you will specify the dimensions and cost (if you do not plan to leave it by default).
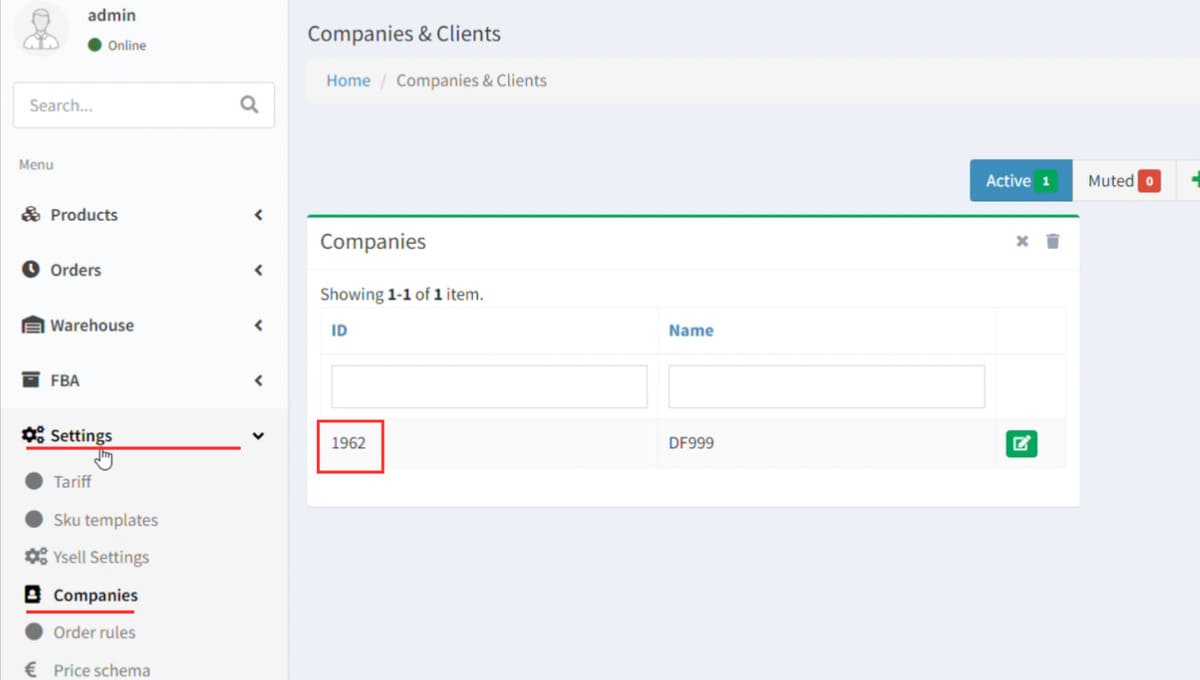
Fourth, change the password to a convenient one and specify the DF number that the manager will give you. It will become the name of your company. Don't forget to fill in your information.
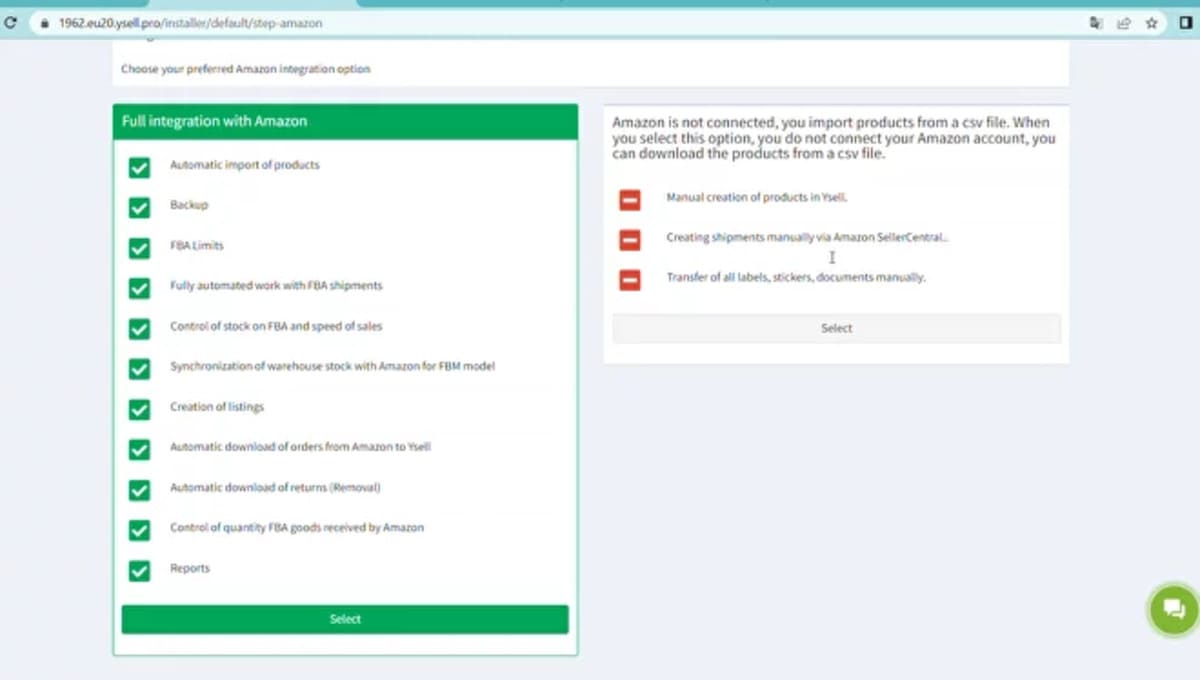
WARNING! If you are cooperating with Yesel for the first time, we do not advise you to go through the integration right away. This can be done later at any time.
Fifth - Another important point - after registration, give your manager the company ID number.
We start work calmly and confidently!
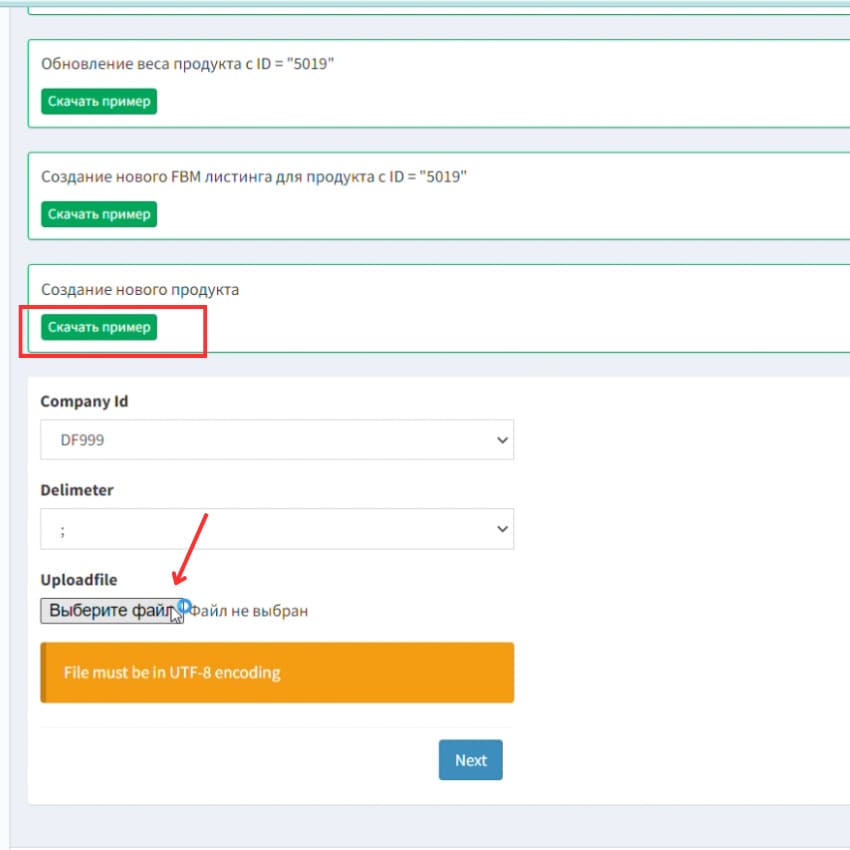
1. Add the assortment of your products for which you work with warehouses. To do this, go to the Products — Import and Export tab. Click on IMPORT and scroll down to templates. Fill in the required fields.
2. Download the templates and save in UT8 format and then upload to the system. Press the NEXT button.
3. Go to the products section and you will see that three products have been uploaded. Go to one of them and the product card will open. Now you can upload a photo of the product, add text, size. It is according to these parameters that the warehouse in the USA works. As a reminder, everything is loaded through the template, but you can change the data at any time.
To record that you are sending goods to the warehouse, go to Prep Client - Shipments. In this tab, you can: send goods to the warehouse, from the warehouse, and perform other actions.
What does it look like in practice?
1. Go to Create Shipments – Shipments Type. There is a list of shipments (tasks). Send to the warehouse, send from the warehouse, transit through the warehouse. Note that each of these shipments performs a different logic of the task. Somewhere we can make a shipment without having a drain. And somewhere you definitely need a stock, as in Sent to be from prep.
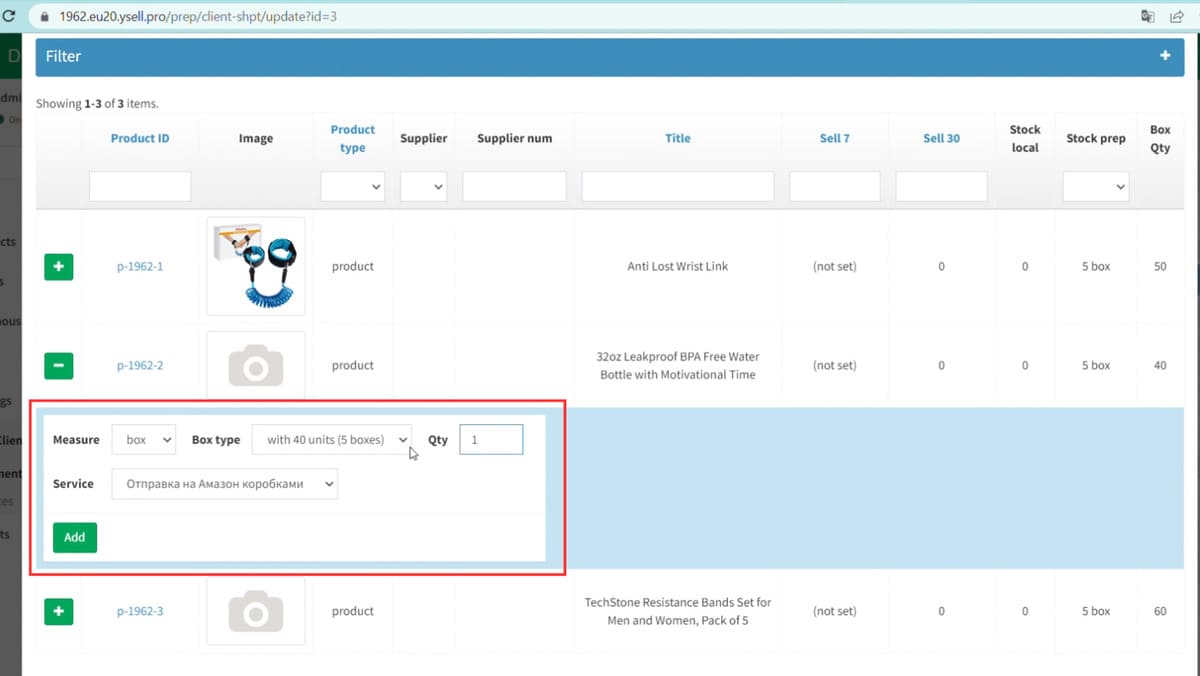
2. Choose "Sent" to the warehouse — then choose one or more warehouses. To choose a product, click Product research, and then research again. You will see the products you have downloaded before.

3. For example, you want to send 5 boxes of each product - click the plus sign on the left. Select BOX.
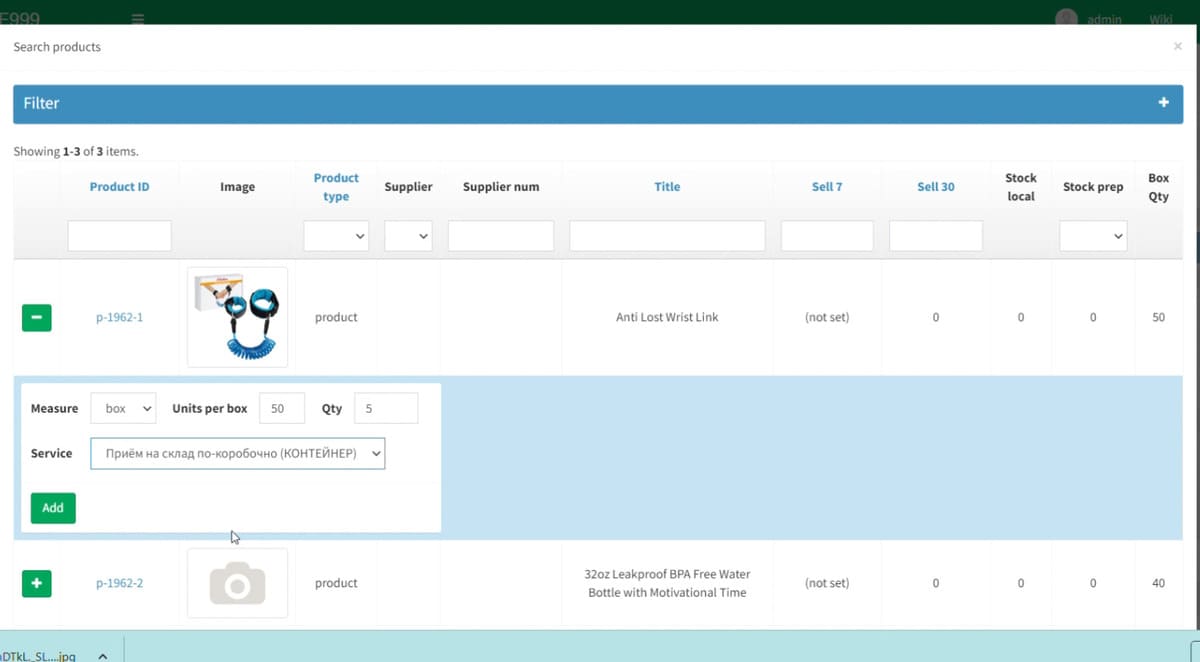
4. Next, select Service — the service provided by the warehouse. With its help, your tasks will be charged. We choose: Reception at the warehouse box by box. Click Edd - add. Do the same with each subsequent product.
There we will see all the information about the product. SKU, service, product quantity, as well as general shipment data, according to what we ent
ered.To mark:
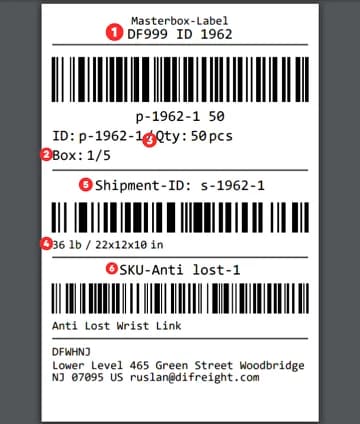
1. Click Actions, then Master box label. Print. You will see the label that the program created. We have 5 such labels and on each of them all the detailed information about the product.
2. All this is printed and glued to the boxes. And so with every product.
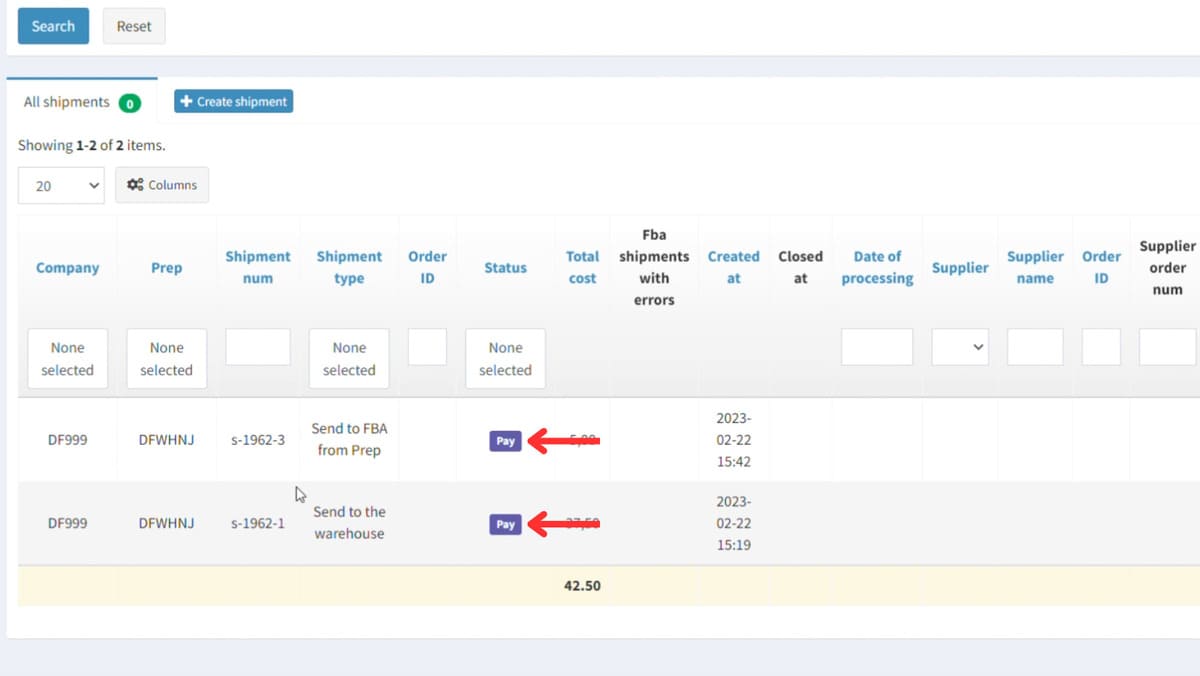
If the status is NEW, it means that the shipment has been seen by the warehouse, and in order for the warehouse to work with it, this shipment must be transferred to the transfer status. To do this, select the Send to prep tab. Next, you will see the address of the warehouse to which you are sending and the cost of the service. Click Send to prep again — the shipment will go into transfer status and will be seen by the warehouse.
1. Go to prep and click Recall Shipment, the status will return to New.
2. It is important that you can change something in the shipment only if the product is in Transfer status. If the cargo is not in Transfer status, then it has already arrived at the warehouse and is being processed
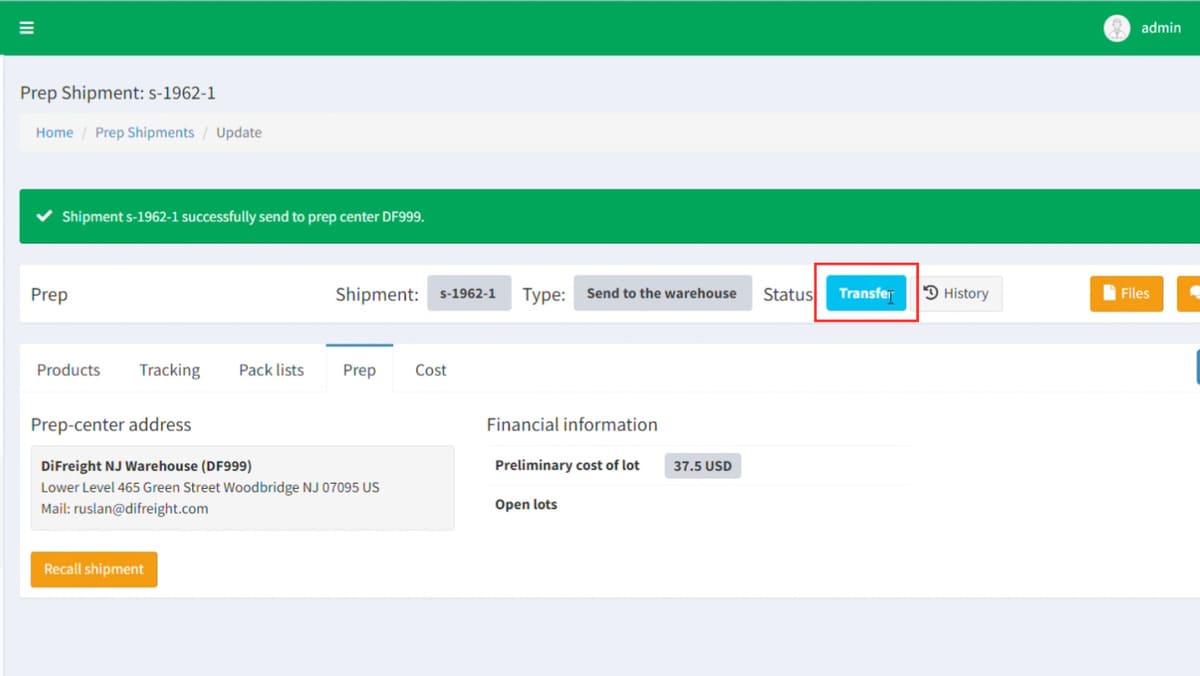
WARNING! You can edit the shipment only in the NEW status
What else can we add at this point?
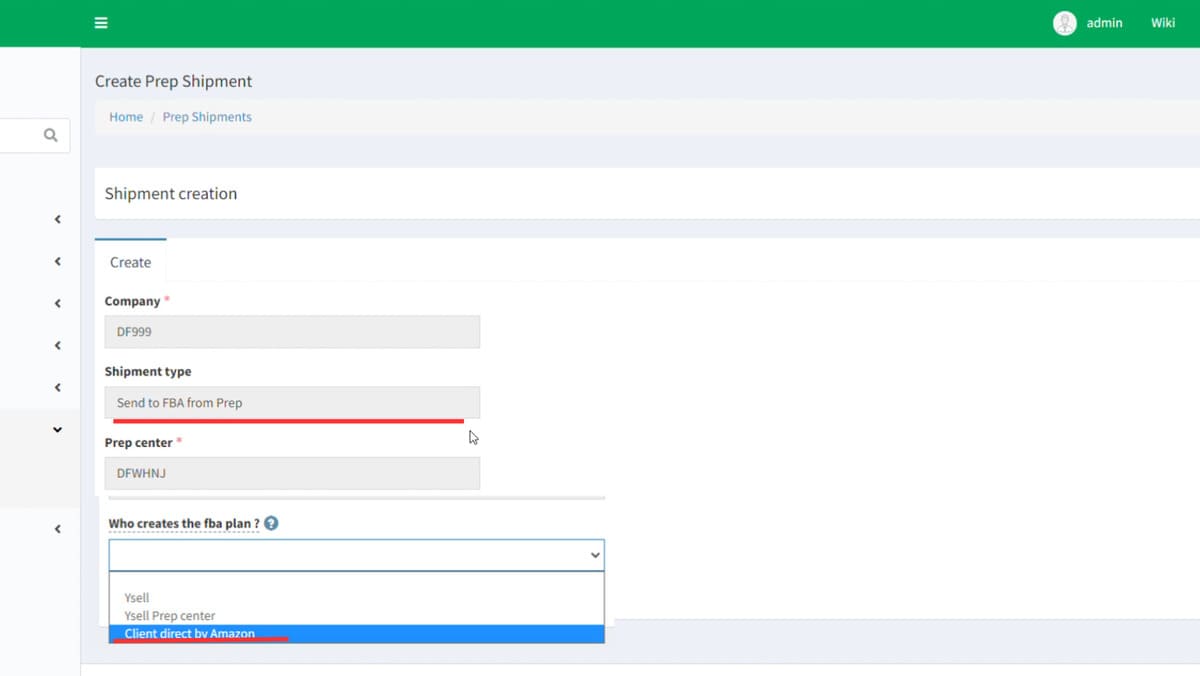
1. Click rate shipment and select Sent to FBA from prep. Next, choose a warehouse. Who creates shipments? If the Yesel account is linked to Amazon, then the warehouse does it. If the integration is not connected, then the Client.
2. Go to Product research. Click research. And you will see your goods. To send, select the function: "Ship to Amazon in boxes".
We remind you that the tab Warehouse - Warehouse product - product owner allows you to see how many products are in stock and where exactly.
We have also prepared a video instruction for you to make warehousing services more understandable.